
A phone button is a programmable key on a phone or SIP device that can be configured to perform a specific action with a single press.
Overview
Buttons are configured at four levels. Each level applies to a different scope, listed here from broadest to most specific:
| Level | Applies to |
|---|---|
| PBX settings | Every device on the tenant |
| Group | Users in that group |
| User | All of that user's devices |
| SIP device | That one device |
Each button is assigned a position (1 to 255). A device supports a limited number of positions, including any added by expansion modules. Positions beyond the device's capacity are ignored during provisioning.
What it does
A device's final layout is resolved one position at a time across all four levels:
- The most specific level wins by default. A button set on the device overrides the user, which overrides the group, which overrides the PBX. A lower level can override a position defined at a higher level.
- A locked button cannot be overridden. Turn off Editable to lock a button so it applies to every level below and cannot be replaced there. When two levels lock the same position, the higher level wins (PBX over group over user). Use a lock for a button that every device must keep, such as a group-pickup key or an emergency speed dial.
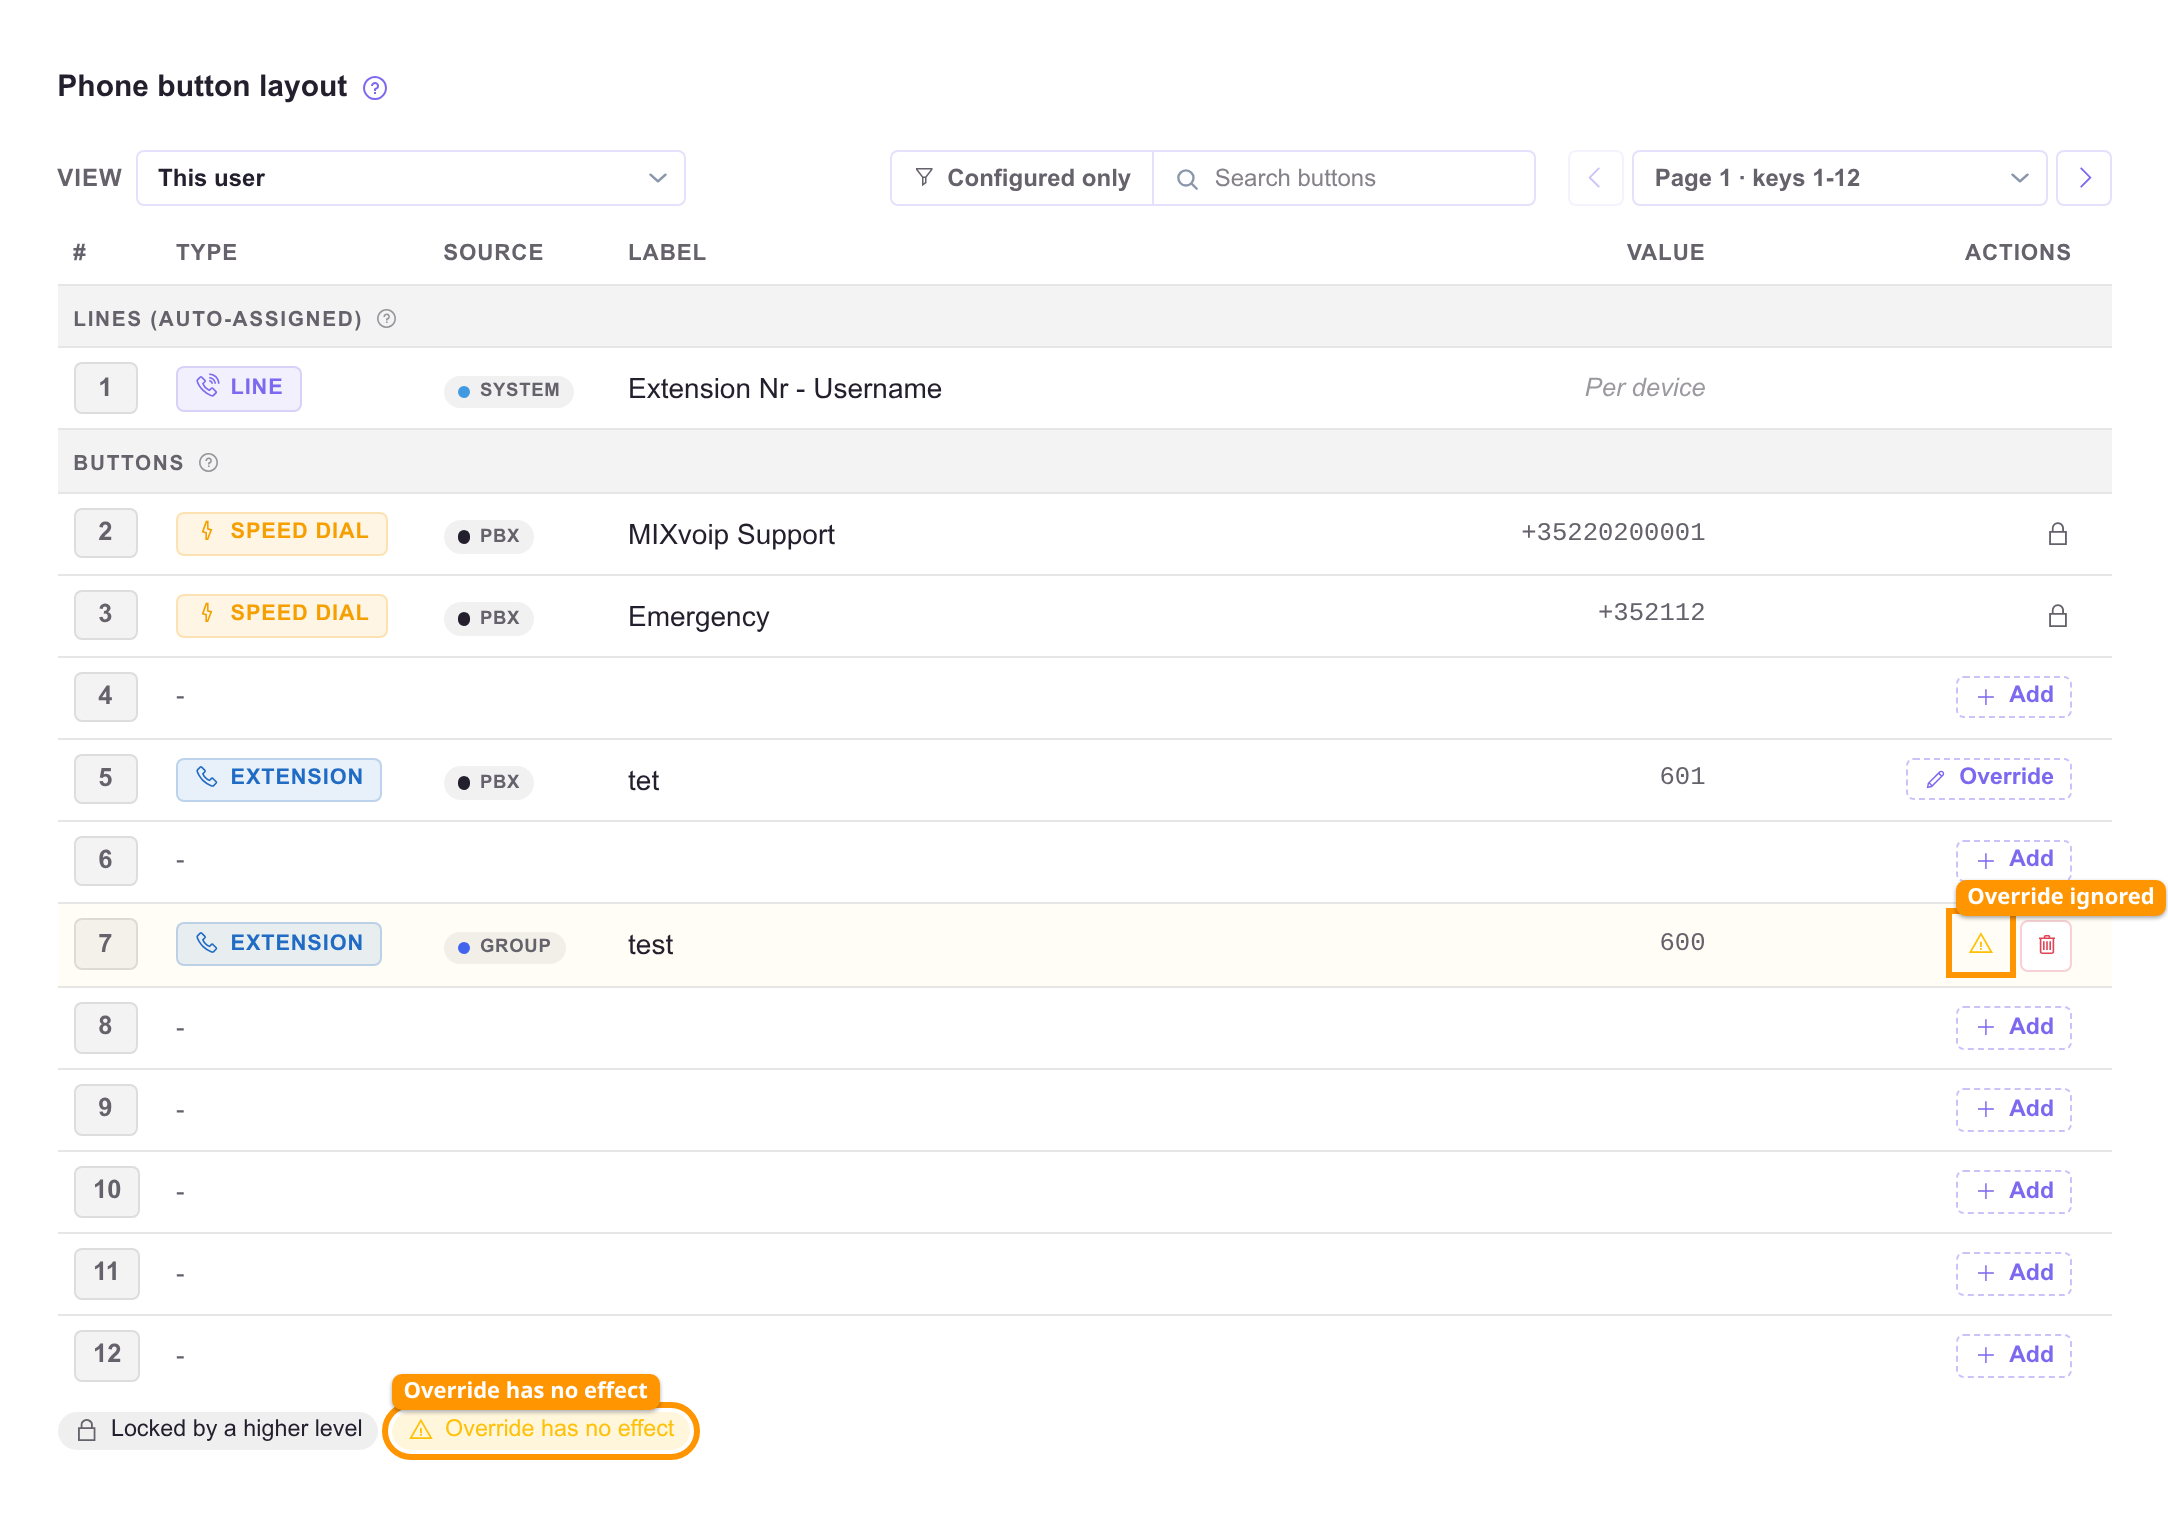
When you edit a group, user, or device, buttons inherited from higher levels appear as read-only rows and locked positions are marked. This shows the effective layout before you add your own buttons.
The phone button editor
Every level opens the same editor. It lists each position with its type, source, label, and value, and merges the four levels into the layout provisioned to the device.
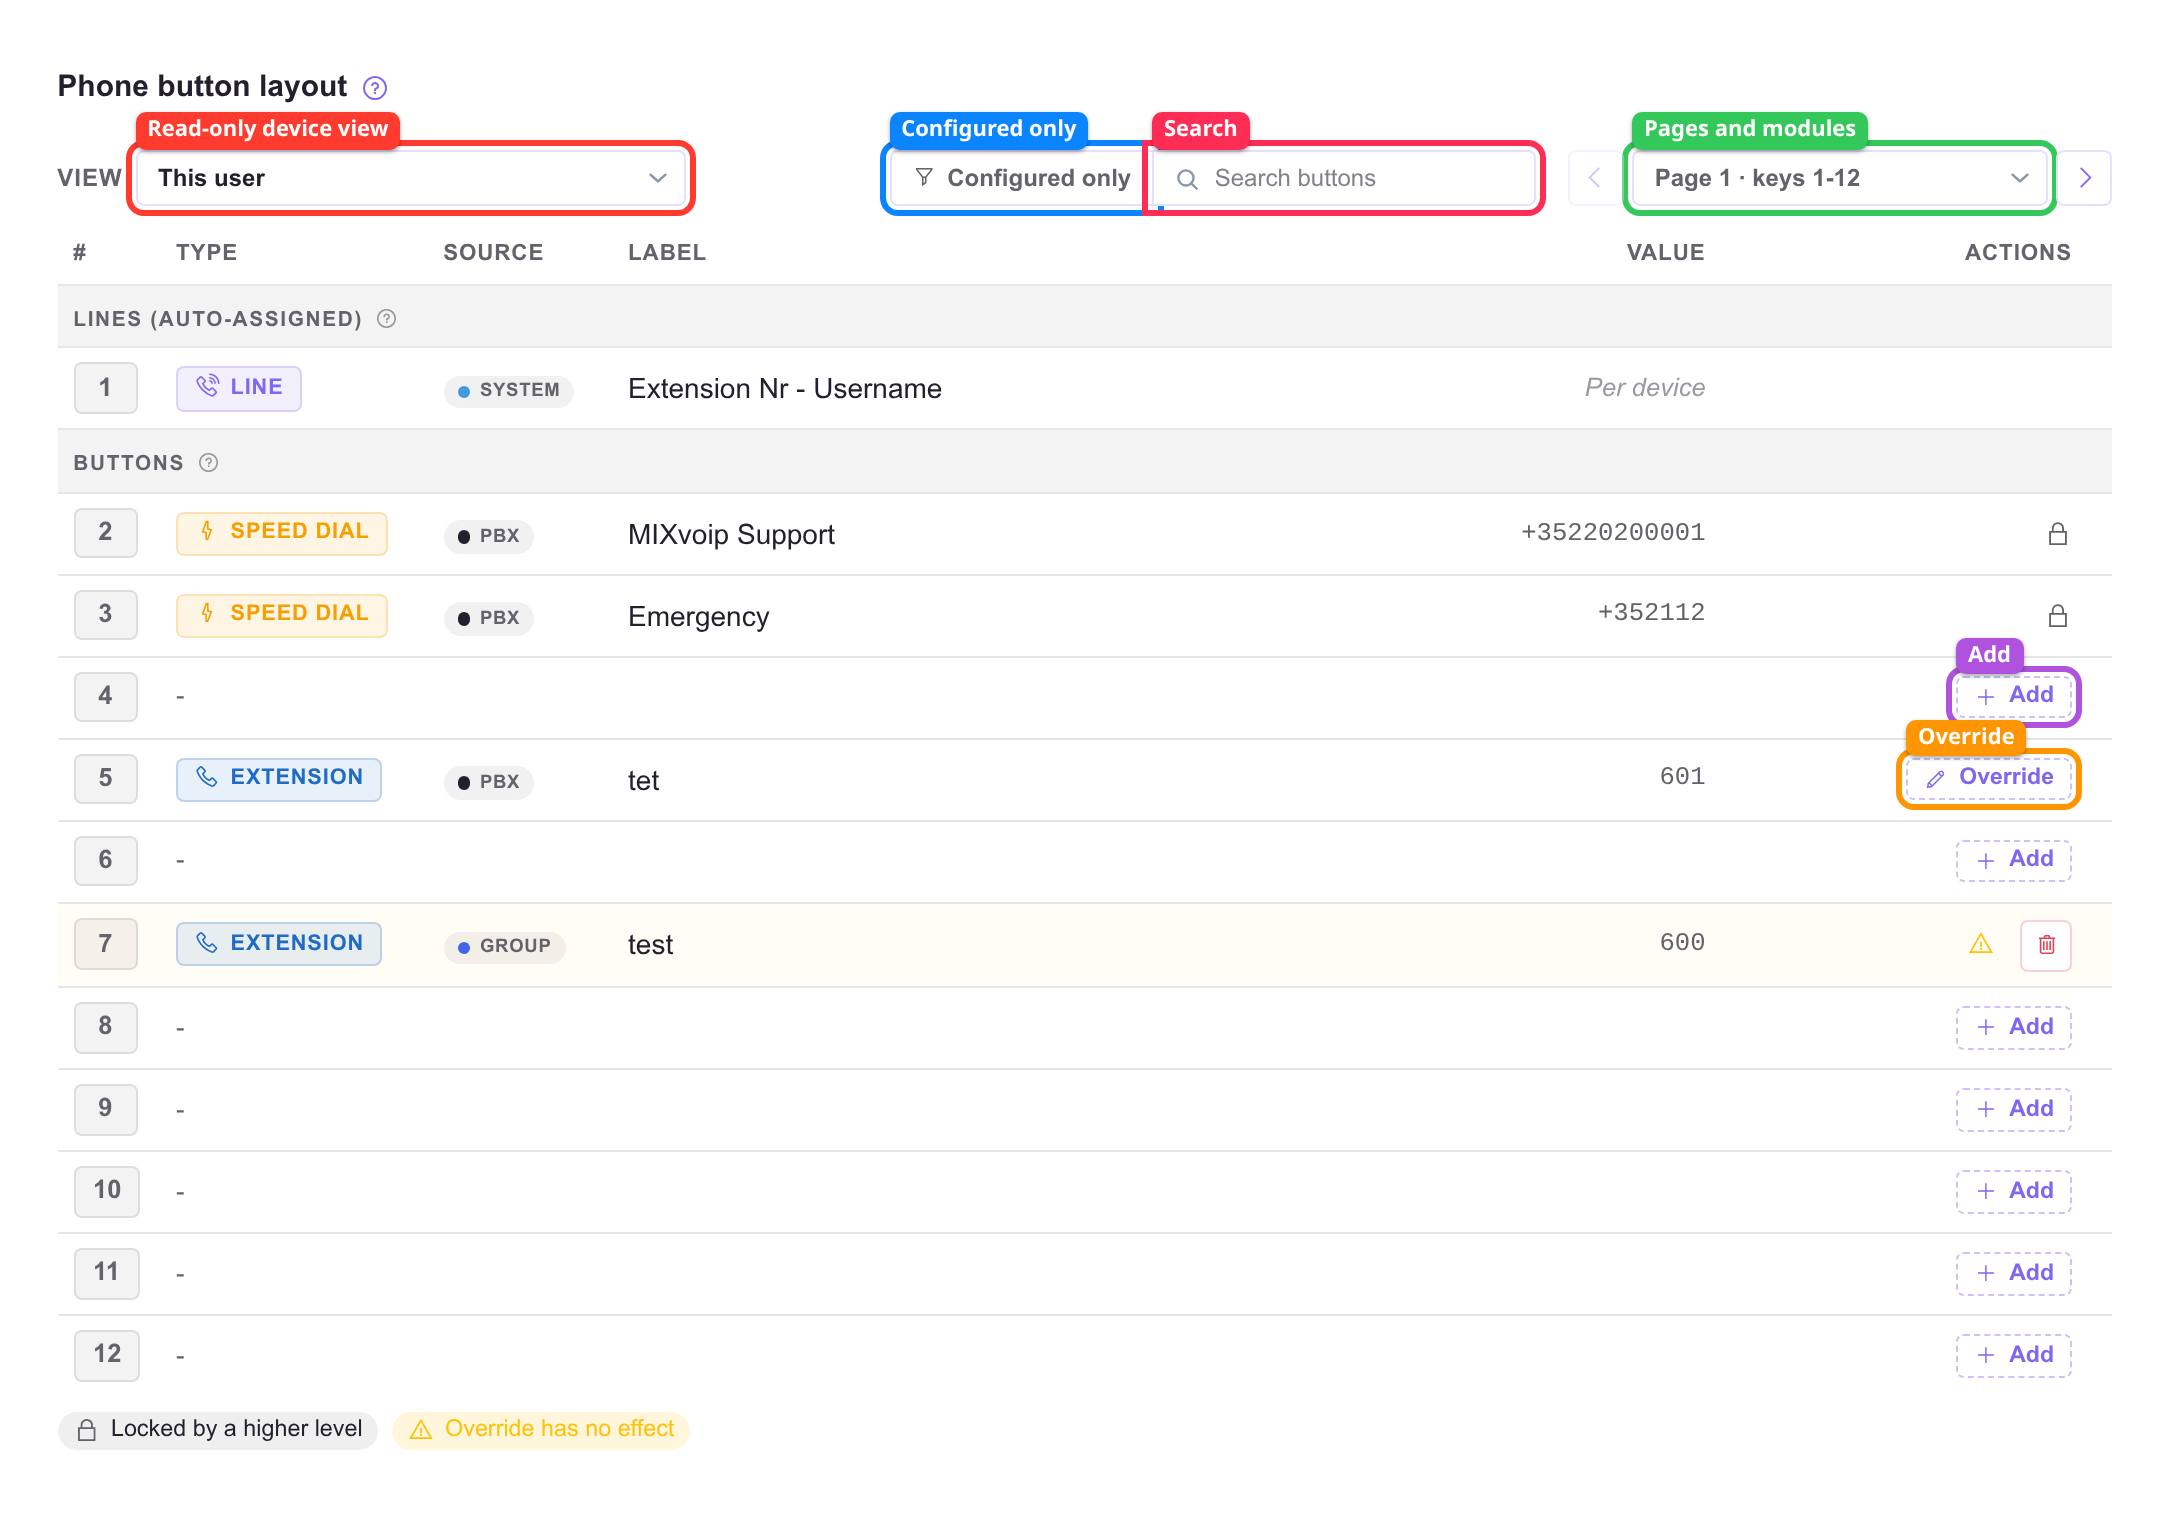
| Outline | Control | What it does |
|---|---|---|
| Purple | Add | Add your own button at an empty position. |
| Orange | Override | Replace an inherited button at this position with your own. |
| Blue | Configured only | Hide empty positions and list only the set buttons. |
| Pink | Search | Filter the list by label or value. |
| Red | Read-only device view | Preview the layout on a specific SIP device, read-only. |
| Green | Pages and modules | Jump between key pages and expansion modules. |
Overriding an inherited button
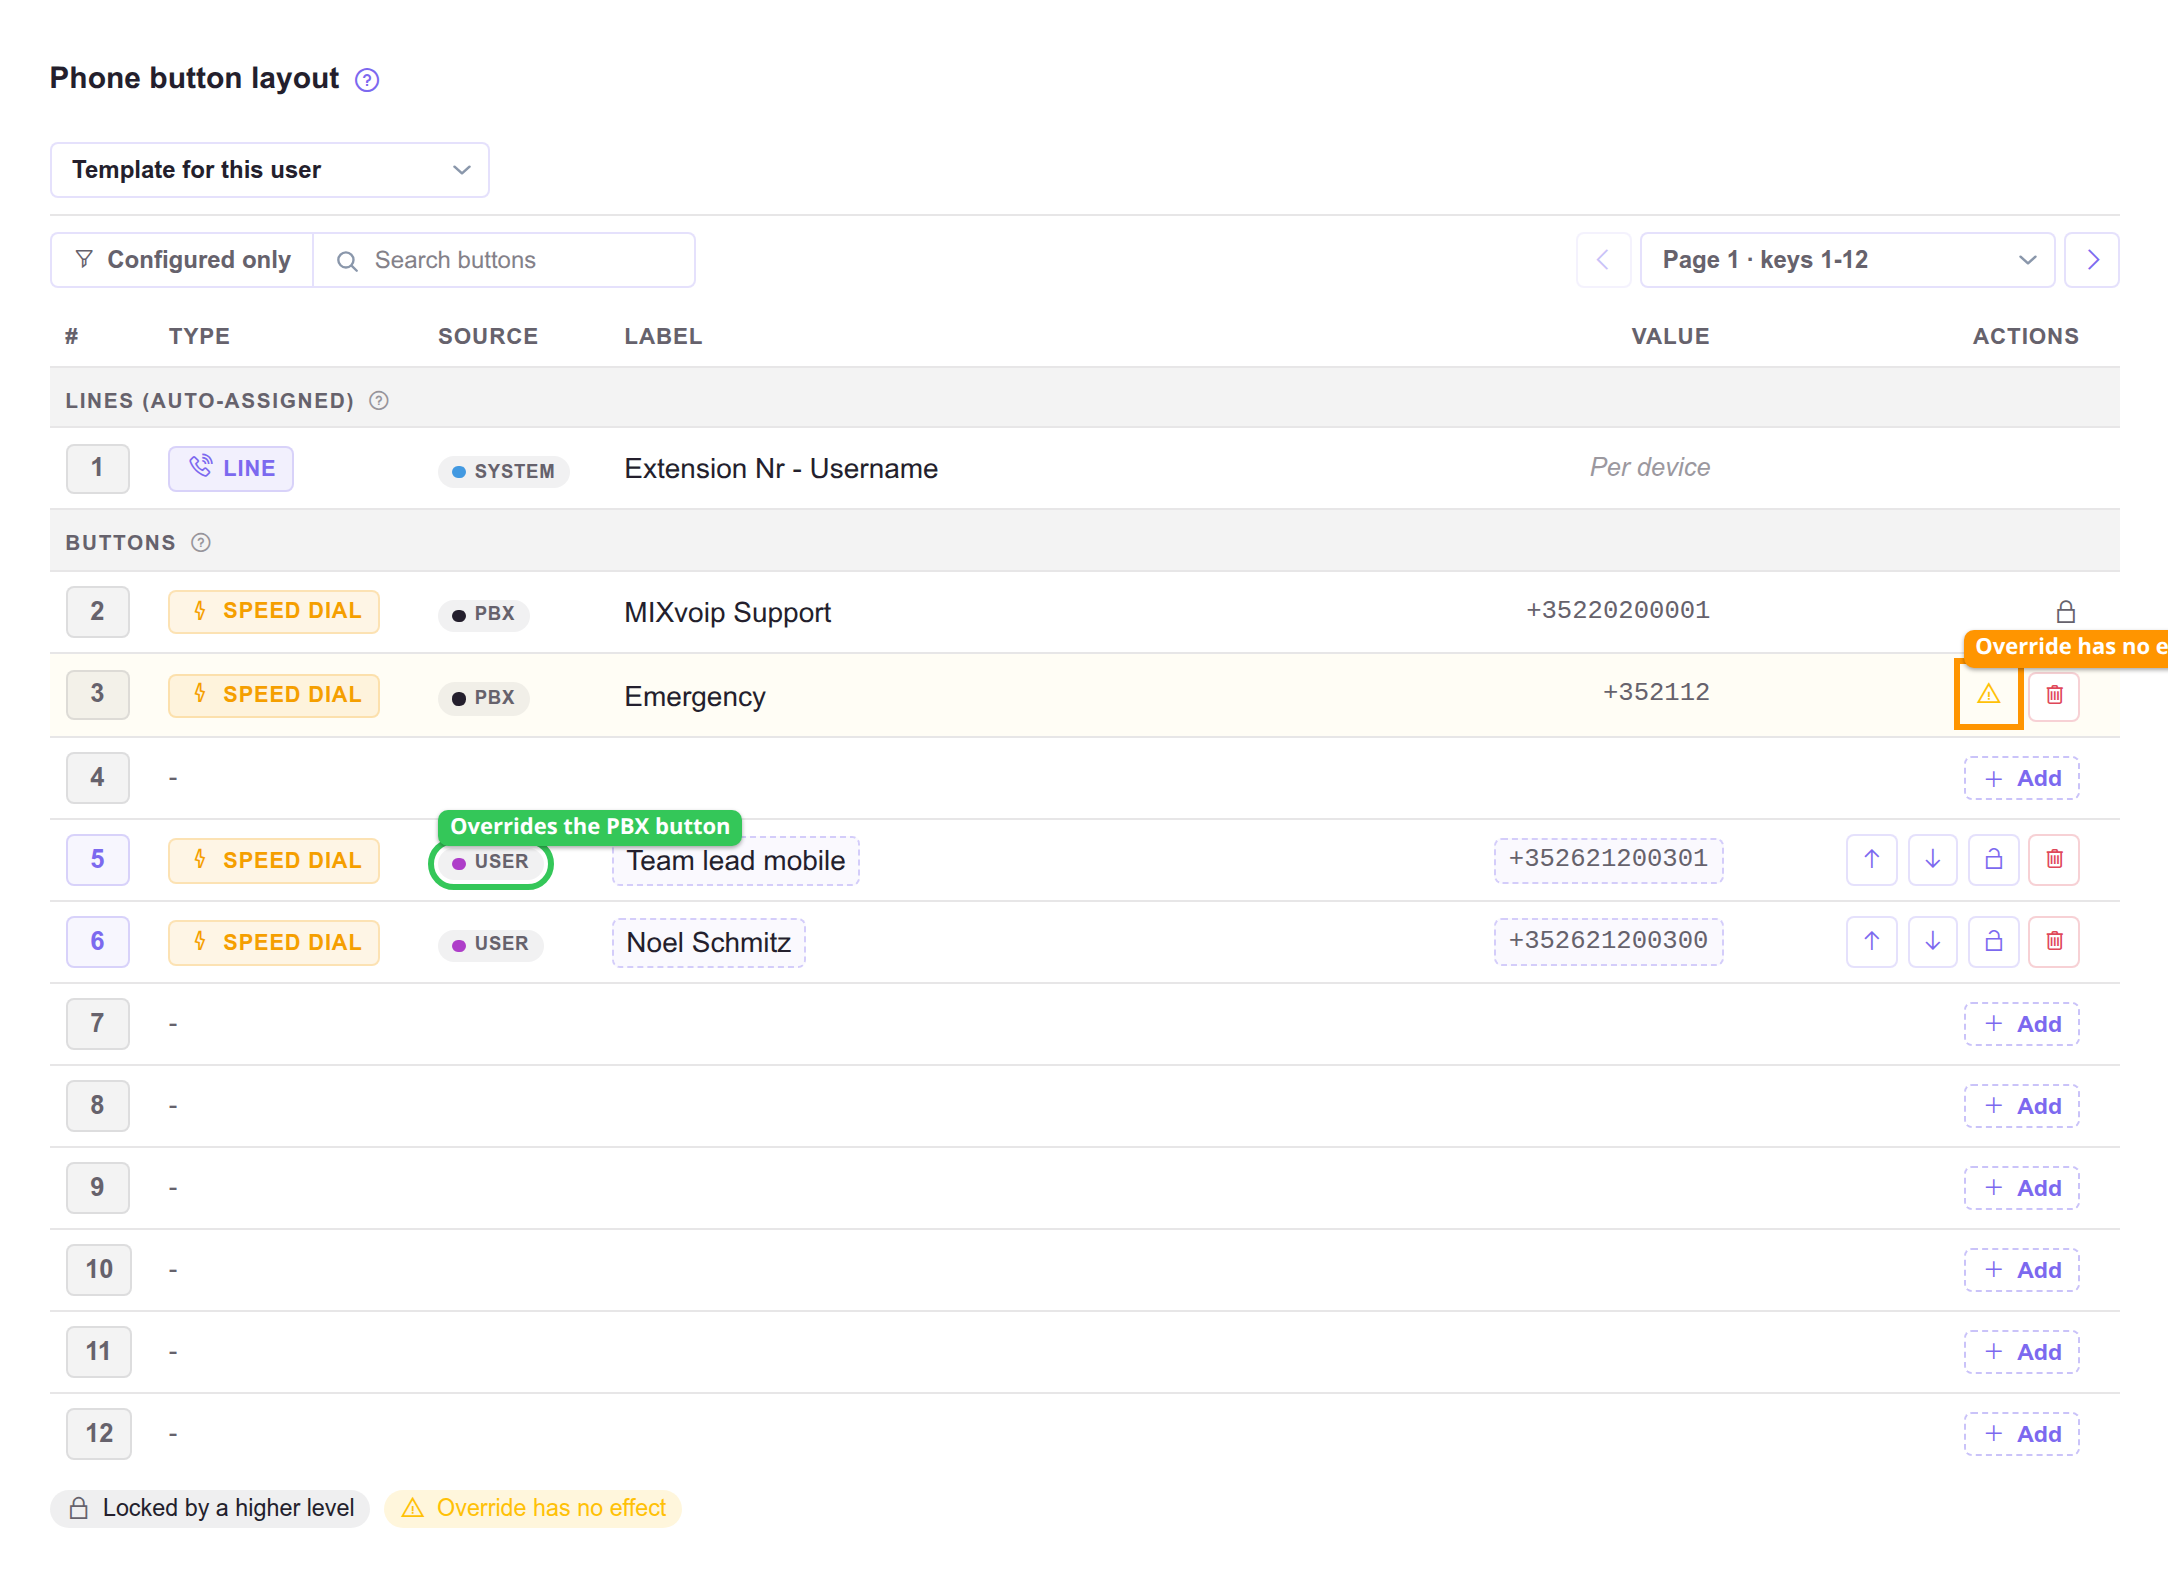
| Outline | State | Meaning |
|---|---|---|
| Green | Source shows User | Your button replaced the inherited one at this position. The higher-level button is hidden. |
| Orange | Warning triangle | The inherited button at this position is locked, so your button sits there without taking effect. |
The two badges under the table are the legend for this: a padlock means locked by a higher level, and the warning triangle means an override with no effect. A locked position is the one case where adding your own button changes nothing, so check the source column before assuming a button will ring.
Auto-assigned lines
The first positions are auto-assigned lines. They use the System source because the system generates them from the SIP account and its outgoing numbers. They cannot be edited and always occupy the first positions.
The count is the extension line at position 1, plus one key per outgoing number (caller identity). A single outgoing number is the default and needs no dedicated key, so additional identity lines appear only when more than one outgoing number is configured. Programmable buttons start after the auto-assigned lines.
Read-only device preview
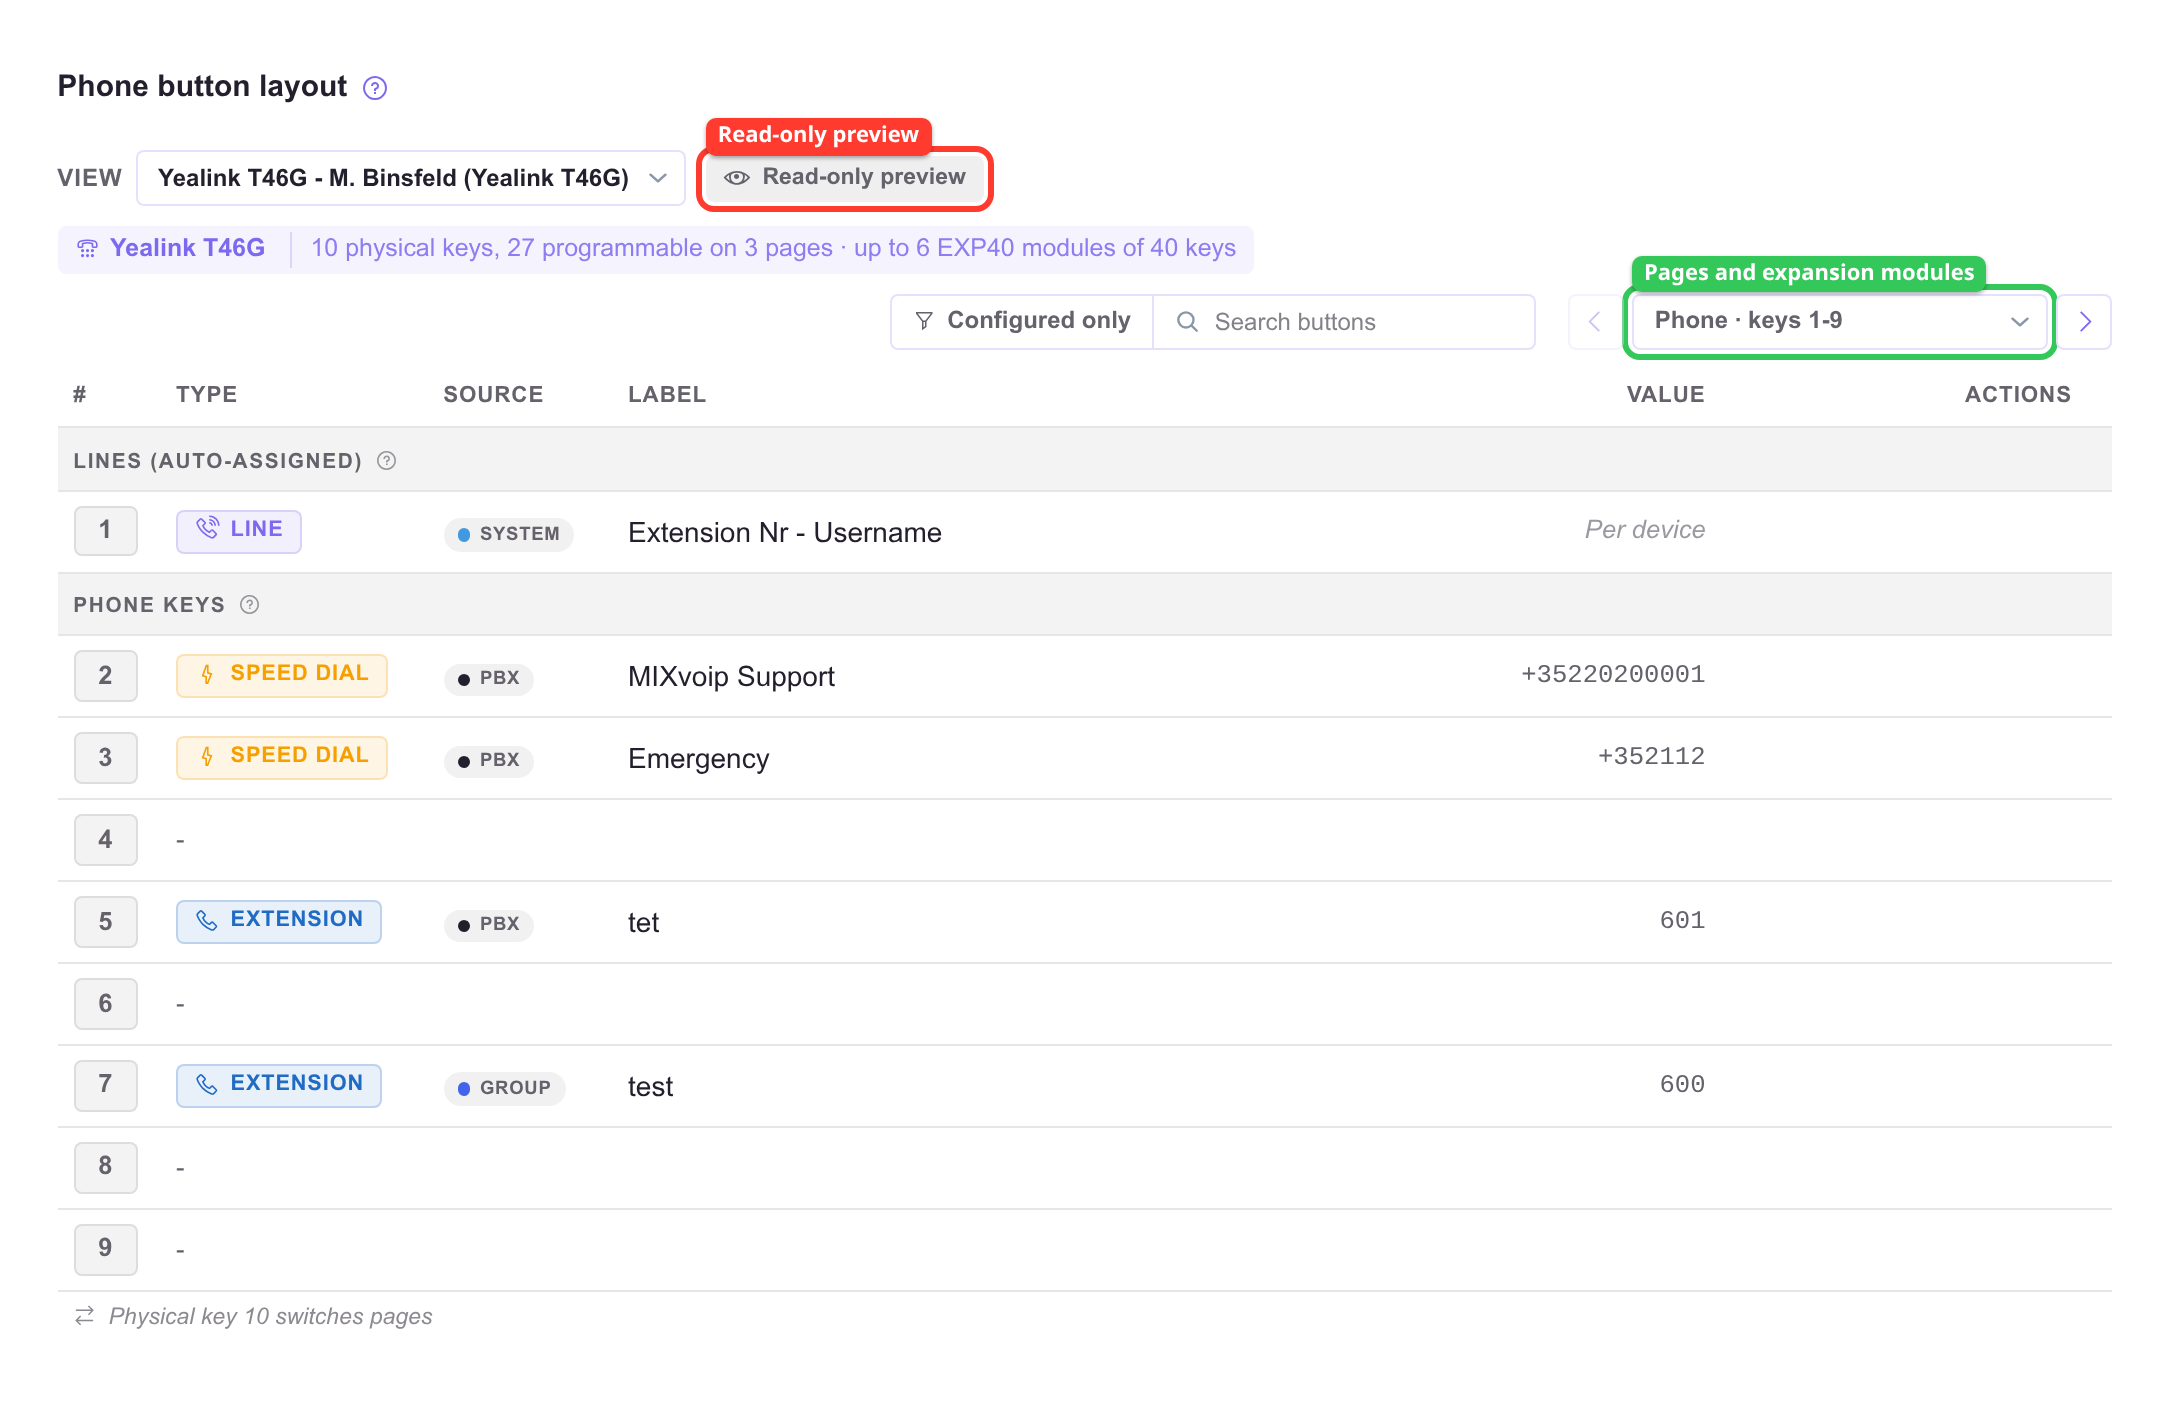
When the record has a SIP device, the view dropdown switches from "Template for this user" to that device ("View" followed by the device name). The preview is read-only. It shows how the buttons map to that phone model across its physical keys, pages, and expansion modules.
The preview includes changes you have made to the template but not yet saved, so you can check how a new button lands on each phone before saving. Buttons set on the device itself still win over the template.
On a user with exactly one SIP device, the "Template for this user" view already uses that phone's layout: the grid pages like its hardware and offers its keys and expansion modules. With two or more devices there is no single layout to follow, so the user view lists positions in pages of 12 and each device shows its own layout in its preview.
Adding a button
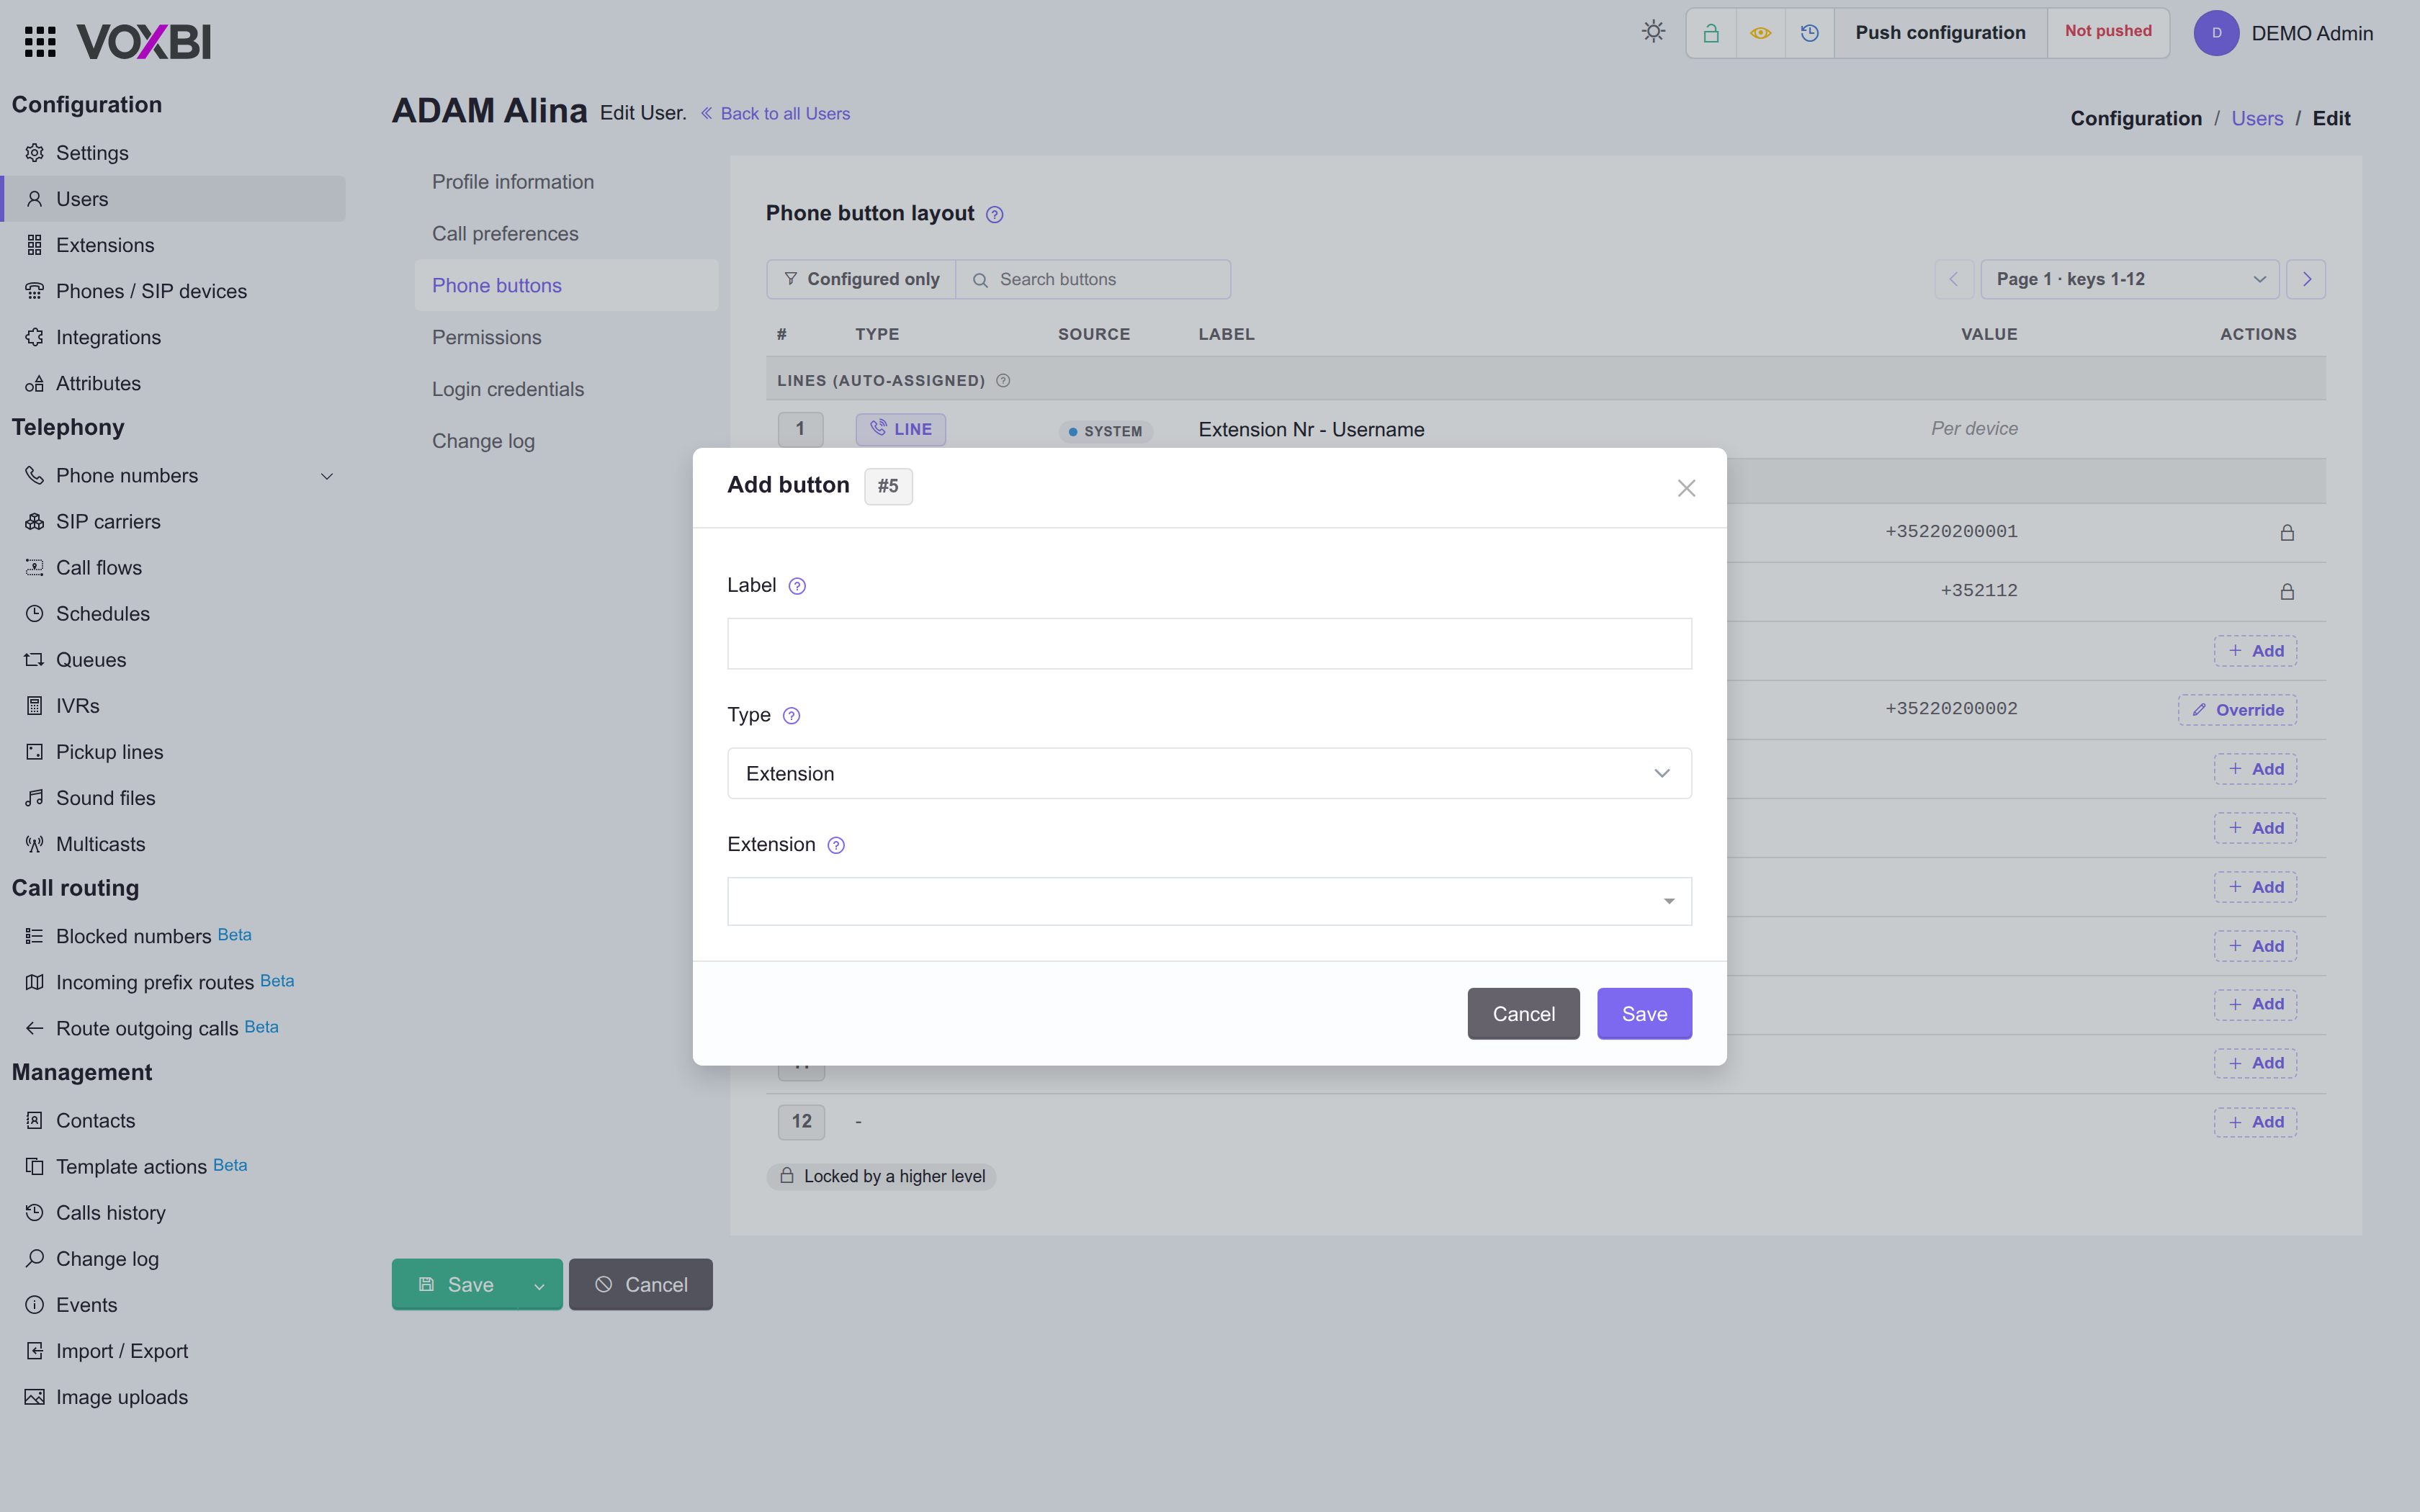
Click Add on an empty position to open the button form. Select a type, then complete the field it requires.
When an override has no effect
If a lower level sets a position and a higher level later locks it, the lower button is retained but ignored. The editor marks it with a warning to indicate the button no longer applies.
See also
- SIP devices - the hardware that receives the merged layout.
- Extensions and Pickup lines - common monitoring targets.
- Multicasts - the paging target for Multicast keys.
- Call flows - the target for Toggle call flow keys.